
A complete Nepal trekking pack weighs 8 to 12 kg once you exclude what your porter carries, and it breaks into four clothing layers plus footwear, sleep gear, and documents. Four items are non-negotiable regardless of route: a four-season sleeping bag rated to minus 10 degrees Celsius, boots broken in before you fly, a down jacket, and a 35 to 45 litre daypack with a hip belt. What follows runs through every category with a checklist table, current gear-rental rates in Kathmandu and Pokhara, and how the load shifts by season and by altitude band.
A trekking packing list is the categorised inventory of clothing, equipment, and documents a trekker carries on a multi-day Himalayan route, built around a layering system that has to work across roughly 3,000 vertical metres, from Pokhara's subtropical trailheads to a 5,400 m pass. Thin layers you can add and strip beat one heavy coat, because temperature on the same trail can swing 20 degrees between a sunlit lunch stop and a frosted 5 a.m. departure.
How much does the kit change between a lodge trek and a 5,400 m pass?
Nepal's teahouse treks fall into three rough altitude bands, and gear choices should follow the band your itinerary reaches rather than the trek's name recognition. Below roughly 3,500 m, the territory of Poon Hill (3,210 m) and the lower Mardi Himal trail, a mid-weight fleece and a budget down jacket cover the cold, and hot showers are rarely more than an hour's walk away. Between 3,500 m and 4,800 m, the band that holds Annapurna Base Camp (4,130 m), Manang (3,540 m) on the Annapurna Circuit, and Kyanjin Ri above the Langtang Valley, night temperatures sit below freezing even during the October and April high seasons, and the minus-10 sleeping bag stops being a nice-to-have. Above 5,000 m, where Thorong La (5,416 m) and Kala Patthar (5,545 m) on the Everest side sit, wind chill can drag the felt temperature 15 to 20 degrees below the thermometer, and only expedition-weight insulation holds up.
The categories below cover the full range. Match the specifics to whichever band your itinerary tops out at, and treat the rest as backup for a colder night than planned.
The base layer: moisture management
Merino wool earns its reputation on multi-day treks because it resists odour for several days running, where a synthetic tee turns rank by day three. Pack two or three long-sleeve merino or synthetic tops plus one set of thermal bottoms, and skip cotton entirely: it holds sweat against skin and turns cold fast the moment the sun drops behind a ridge. Past Manang at 3,540 m, laundry service vanishes from the teahouse menu, so the two tops you rotate on the way up are the two tops you are stuck with higher on the trail.
The same base layers double as sleepwear once night temperatures drop below freezing, which happens above roughly 3,000 m for most of the year. A rest day built into the itinerary, the kind our best time to trek the Annapurna Circuit guide recommends for acclimatisation, is also your best chance to wash and dry a spare top before climbing higher. Sleeping in a damp base layer at 4,000 m costs you a night's sleep and, in bad cases, body heat you cannot easily get back.
The mid layer: insulation
A fleece jacket plus a down or synthetic puffy jacket forms the mid-layer pair that does most of the temperature work on a Nepal trek. The down jacket carries the most weight in that pair: a 550-fill jacket is enough for anything that stays under 4,000 m, but step up to a 700-fill jacket rated to around minus 15 degrees Celsius for routes that reach Manang, Dingboche, or a high pass. Evenings above 4,000 m drop below freezing even in the clearest October week, and the down jacket is what turns a teahouse dinner into something you can sit through.
Layering flexes with altitude across a single trek rather than staying fixed for two or three weeks straight. Wear the fleece alone through the lower, forested valleys, and add the down once the trail climbs past treeline. Trekkers on the pre-dawn start for Thorong La's 5,416 m day typically wear both layers under a wind shell, because temperatures at High Camp before sunrise routinely sit at minus 10 degrees Celsius or colder.
The outer layer: wind and rain
Wind, not rain, is the outer layer's main job at altitude, though a waterproof breathable jacket and matching trousers handle both. A hard shell with taped seams stops the sudden weather that rolls over high passes within the hour, and the same shell cuts the wind chill that turns a merely cold morning into a dangerous one. Even in the dry autumn window, pack the shell: a clear sky at breakfast in Manang says nothing about conditions three hours later at Yak Kharka.
A torn seam or a stuck zip defeats the entire layering system, because it lets weather straight through to the insulation underneath. Test your shell before you fly, and pack it in a dry bag inside your duffel rather than loose. Staying warm and dry is one of the few things you fully control at altitude, and our altitude sickness prevention guide explains why that supports acclimatisation as much as it does comfort.
The daypack: what you carry yourself
A 35 to 45 litre daypack carries what you need during the walking day while a porter takes the rest, and fit matters more than brand: the hip belt should sit on your hips, not your waist, and take the bulk of the weight off your shoulders. Inside goes water, snacks, your rain shell, your down jacket, a camera, and any document you would never hand to a porter. A rain cover for the pack and a small dry bag for electronics protect the contents when the weather turns without warning.
Pack the daypack in the order you will need things. The down jacket and rain shell go on top, reachable without unpacking the whole bag, because mountain weather can flip within the hour. Water and snacks go in the side pockets for one-handed access on the move, and the heaviest items ride close to your back to keep the load stable on uneven trail. A well-balanced 6 kg daypack feels lighter on the trail than a badly packed 4 kg one.
Health, hygiene, and electronics
A personal first-aid kit fills the gap between teahouses, where the nearest pharmacy can be a day's walk away. Pack blister plasters, ibuprofen or paracetamol, oral rehydration salts, a broad-spectrum antibiotic such as azithromycin, and Diamox for altitude, all agreed with your doctor before you fly. Hand sanitiser, a quick-dry towel, biodegradable soap, and toilet paper pull their weight too: the stomach upsets that end more treks than altitude does usually start with dirty hands, not thin air.
Sun protection is not optional above 3,000 m. SPF 50 sunscreen and a UV-rated lip balm guard against sun that is meaningfully stronger at altitude than at sea level, and a 20,000 mAh power bank plus a universal adapter solve the charging problem before it starts, since grid power at high teahouses is unreliable and metered by the hour. Keep your phone and camera batteries inside your sleeping bag overnight: cold drains a battery fast, and a dead camera on pass morning is a bad trade for an extra 200 grams of power bank.
Footwear and sleep systems
Boots decide trail comfort more than any other single item on this list, and a 50 km break-in before you fly is the fix that prevents most blister problems. Wear broken-in, waterproof boots with ankle support, and pack two or three pairs of wool socks plus lightweight camp sandals for evenings at the lodge. Boots straight out of the box are one of the most common reasons trekkers develop blisters severe enough to end a trek early.
A four-season sleeping bag rated to minus 10 degrees Celsius covers teahouse nights on almost every route in this guide, since lodge blankets get thinner, not thicker, as you climb. A silk or cotton liner adds roughly 5 degrees of warmth and keeps the bag clean between rentals or long trips. On routes that top 5,000 m, such as Thorong La or the approach to Kala Patthar, pair the bag with an extra base layer rather than assuming the rating alone will carry you through a windy night at High Camp.
Accessories and the packing checklist
A handful of small items close the gaps in the system: a headlamp with spare batteries for pre-dawn starts and unlit teahouse corridors, category-4 sunglasses for glare off snow, a warm beanie, a sun hat, and both liner and insulated gloves. A 1 litre bottle plus purification tablets or a filter saves money over buying boiled water at every stop, and it cuts down on plastic waste on trails that already struggle with it. The table below breaks the full list down by category.
| Category | Key items | Notes |
|---|---|---|
| Base layer | 2–3 merino tops, thermal bottoms | No cotton |
| Mid layer | Fleece, down jacket | 550-fill under 4,000 m; 700-fill (-15°C) above |
| Outer layer | Waterproof jacket, rain trousers | Taped seams |
| Footwear | Boots, 2–3 wool socks, camp sandals | Break boots in over 50 km |
| Sleep | Bag rated to −10°C, liner | Liner adds ~5°C |
| Accessories | Headlamp, sunglasses, gloves, hat | Category-4 lenses above 3,000 m |
| Documents | Passport, permits, insurance | Waterproof sleeve |
Renting gear in Kathmandu and Pokhara
Thamel in Kathmandu and Lakeside in Pokhara both have trekking-gear rental shops clustered within a few blocks, so you do not have to fly bulky cold-weather gear across the world. A down jacket or a minus-10 sleeping bag rents for roughly USD 1.50 to 2 a day at most shops, trekking poles for closer to USD 1 a day, against a refundable deposit usually held on your passport or a cash bond. Renting just the down jacket and sleeping bag can cut 3 to 4 kg from your check-in weight.
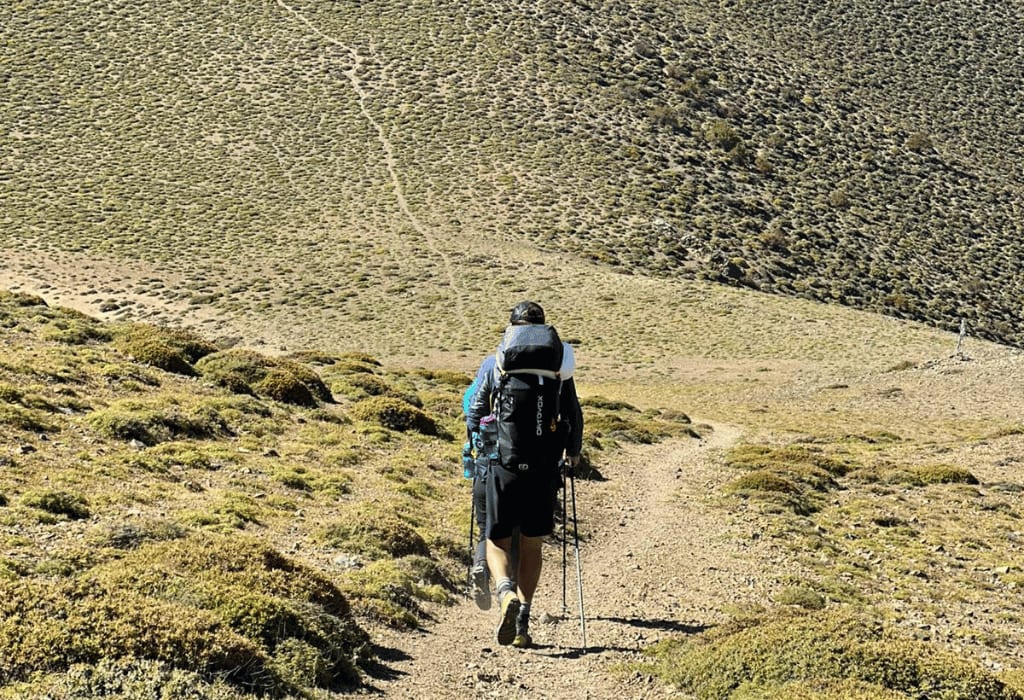
Rent the bulky, one-trip items and bring your own boots, socks, and base layers, since fit and hygiene count for more on anything worn directly against skin. Rental shops cluster within walking distance of where you collect permits, so a single buffer day in Kathmandu or Pokhara covers both errands, the same buffer day our Nepal trekking permits guide recommends before you head to the trailhead.
Documents and money you must carry
Documents belong in a waterproof sleeve inside your daypack, never in the duffel handed to a porter, because losing a passport or a permit mid-trek can end the trip on the spot. Carry your passport, the physical ACAP and TIMS cards, insurance details, and a photocopy of each in case the originals get wet. A spare passport photo or two covers any restricted-area checkpoint that asks for one you did not expect to need.
Cash needs the same attention, since ATMs stop past Besisahar on the Annapurna side and past Lukla on the Everest side. Budget roughly USD 15 to 20 a day for hot showers, charging, wifi, and snacks on top of whatever your package already covers, in small-denomination Nepali rupees that high teahouses can actually change. Guides and porters are tipped as a lump sum on the final evening rather than daily: convention runs USD 15 to 25 a day, pooled from the whole group, for a guide, and USD 8 to 12 a day for a porter.
Weight limits and seasonal adjustments
Domestic flights to Lukla and Jomsom cap baggage at 10 kg checked plus 5 kg carry-on, so a porter carrying your 8 to 12 kg duffel keeps you inside that limit while you walk with a light daypack. Spring and autumn need only the standard layering kit described above. A winter departure, December through February, adds a warmer bag rating, one extra mid layer, and traction spikes for snow-affected passes, while a monsoon trek from June through August trades some of that warmth for quick-dry fabric and extra waterproofing.
Seasonal tuning changes a handful of items, not the whole list, and it is the last step once the rest of the kit is sorted. Annapurna Trekking supplies the duffel bag, arranges porters within the flight weight limits, and can point you to reliable rental shops before you land. For a checklist tailored to your specific route and month, message our team on WhatsApp at +977 984 159 5962 or use our contact page, whether you are packing for the Everest Base Camp trek or the Annapurna Circuit.
Frequently asked questions
Can you rent trekking gear in Kathmandu?
Yes. Thamel's gear shops rent down jackets and sleeping bags for a few dollars a day, which many trekkers use instead of buying cold-weather kit for one trip. Buy boots and base layers at home for fit and hygiene.
How cold does it get on a Nepal trek?
High teahouses drop below freezing at night, often to minus 10 Celsius or lower above 4,500 metres, while daytime walking can be warm. A layering system handles the swing better than one heavy coat.
What boots do you need for trekking in Nepal?
Waterproof, ankle-supporting trekking boots broken in before the trip are the single most important item. New boots on the trail are the most common cause of blisters.
Related guides

Founder & Lead Guide, Annapurna Trekking
AJ founded Annapurna Trekking in 2016 and has personally guided treks across Nepal ever since. More about our team →